CONCEPT
PROBLEM
I’m busy and don’t always remember to practice guitar. By making my own pedal, I’m more likely to practice guitar to try it out.
REASONING
I’ve been very interested in building custom guitar amps and pedals. It’s something I’ve always wanted to do, but never had the opportunity to. I’d also like to learn how to do this because I’m interested in selling custom guitar pedals and amps.
CHALLENGES
I’ve got a pretty good understanding of electronics and circuitry, but not enough to build my own pedals. I would like to gather as much knowledge in the subject, because I plan on continuing to make different types of pedals for different effects.
PERSONA
NAME: BILLY SLAMMER
GENDER: MALE
AGE: 32
FAMILY: SINGLE
OCCUPATION: NURSE
HOBBIES: VIDEO GAMES, SPORTS, GUNS, PLAYING GUITAR
TECHNOLOGY FAMILIARITY: CAN USE STANDARD TECHNOLOGY EFFICIENTLY
DEVICES USED: IPHONE 7, MACBOOK AIR, CHEVY MALIBU
COLLECTIONS: GUITARS (2-3), BEER BOTTLES, HATS
AMAZON ORDER HISTORY: MADDEN, WATCH, IPHONE CABLES
FREQUENTLY USED APPS: EMAIL, SAFARI, IMESSAGE, APPLE MUSIC
THE CIRCUIT
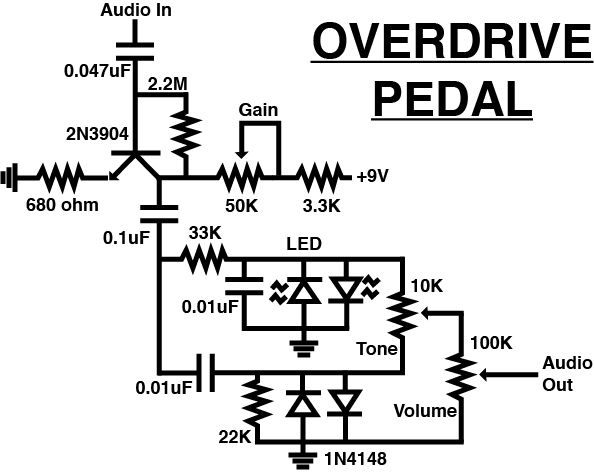
This overdrive pedal is heavily influenced by the above schematic from this Instructables. Being my first pedal, I decided to go with something that had step by step instructions in case there were any issues during assembly (which there were). As you can see above, the audio signal comes in from the top and is fed into a transistor, in parallel with the gain control and power supplied with the 9V battery. This part of the circuit allows the guitarist to control the amount of audio signal coming in. Next, the signal travels through a capacitor before being split into two parallel clipping diode circuits. The top of the signal is clipped by a pair of LED’s where the bottom part of the signal is clipped by the diodes. This is where the distortion is added in. Both diode circuits remove some of the audio signal (the LED’s with the top and the diodes with the bottom). This creates the distorted effect heard with the overdrive pedal. Additionally, the inclusion of LED’s in this circuit is pretty unique, and is one of the main reasons that I chose this circuit in the first place. The LED’s themselves will actually light up (depending upon the settings) and are a cool visual cue, allowing people to actually see the portion of the signal that is being lost in the LED. A video of this can be seen further down the page. After the diodes, the volume and tone controls are then looped into the circuit. The volume, of course, controls the amount of audio signal coming out of the pedal, (in many ways the “reverse” of the gain controls) and the tone control roughly equates to the amount of distortion applied to the signal.
There are a few differences between my final pedal and this schematic, the main one being the fact that I chose a 100k potentiometer over a 50k potentiometer for gain. This allows the guitarist to have more range when controlling the audio input into the pedal. Additionally, I used a different type of audio jack for both the input and output which only added complexity as the part I chose unfortunately had terrible documentation and led to several re-solders as I had to make a few educated guesses regarding which pins corresponded to what part of the signal.
PROTOTYPING
To being prototyping, I needed to order all of the parts. Below is a list of the parts required to make this circuit:
(x1) 2N3904 NPN transistor
(x1) 0.1uF capacitor
(x1) 0.047uF capacitor
(x2) 0.01uF capacitor
(x1) 100K logarithmic potentiometer
(x1) 100K linear potentiometer
(x1) 10K linear potentiometer
(x1) 2.2M ohm resistor
(x1) 33K ohm resistor
(x1) 22K ohm resistor
(x1) 3.3K ohm resistor
(x1) 680 ohm resistor
(x1) PC Board
(x1) 9V battery snap
(x1) 9V battery
(x3) Knobs
(x2) Stereo audio jacks
(x1) Foot switch
(x1) Project enclosure
(x2) 5″ x 4″ x 1/8″ insulating sheet
Because of the tight timeline with this project (~3 weeks) I ordered the parts as soon as I could. I ended up having to order from 4 different suppliers (Sparkfun, Amazon, RadioShack and Ebay).
Once all of the parts arrived, I was ready to begin building. The first thing I started with was the enclosure. I began by drilling holes for the audio in and audio out jacks located on the side. After that, I drilled a hole for the stomp pedal in the center. Following this, I drilled three holes above for the gain, tone, and volume potentiometers. I ended up needing to keep drilling the holes again as I started too small with most of them. Eventually I drilled enough so that all of the components would fit in their desired holes. Next, I cut a rectangular strip of insulating material to act as a seat for the potentiometers. I then glued it into place, and screwed down the potentiometers onto the seat. The rest of the components were tightened into place without seats. I then attached knobs onto the potentiometers. Unfortunately, the volume knob would not fit over the potentiometer. I dremeled away the tip of the potentiometer hoping that I could get it to fit, but realized that the threads themselves were too large to fit the knob. The only way to fit the knob on correctly was to drill away the threads, which would make it nearly impossible to ever remove. Because of this, I decided to leave it as is. Once this was completed, I was ready to move onto wiring.
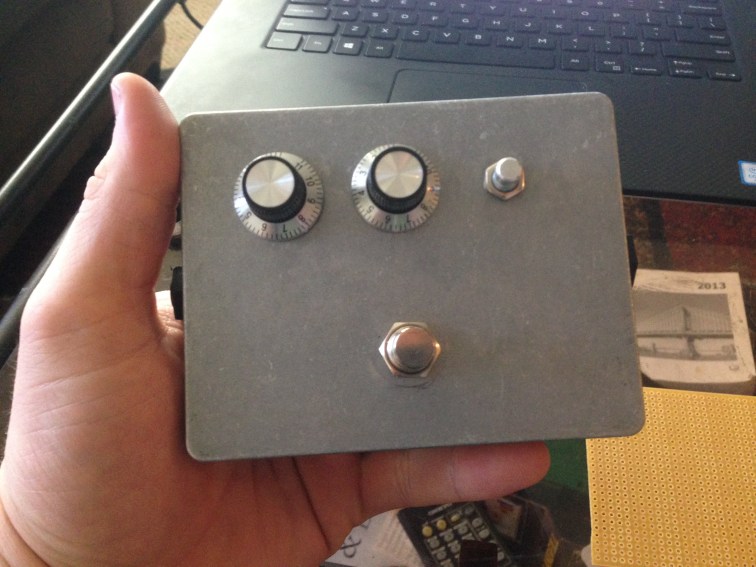
Front
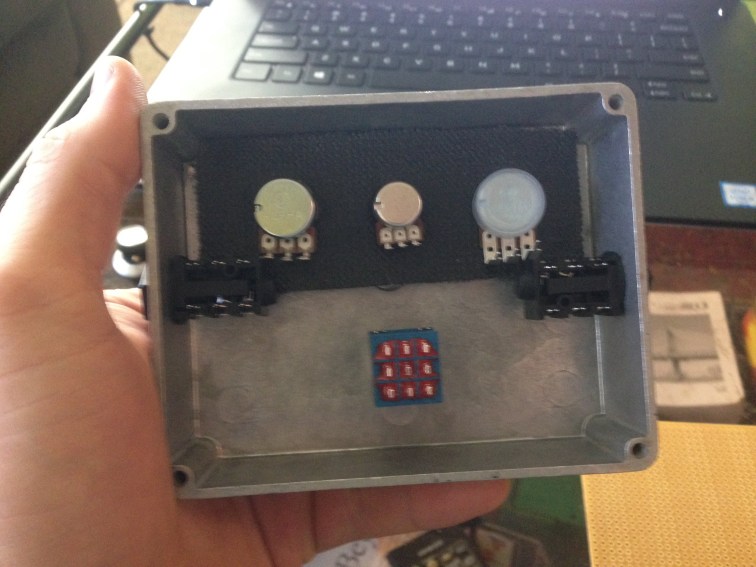
Back
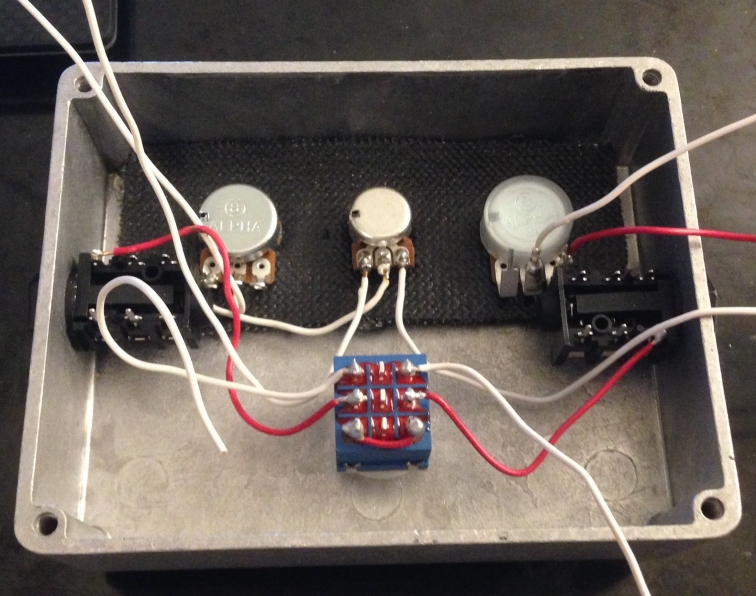
Next, I followed the instructions on how to wire the components together. There were some issues, (mainly the audio jack and foot switch had entirely different layouts than what was shown in the Instructable) but a few educated guesses later, and I had the wiring soldered together. I was now ready to begin the circuit.
I started at the top of the schematic and began to place and solder the components together. This proved more difficult than I anticipated because I thought the PC board that I bought had copper rings around the holes, but the ended up not having them. Fortunately I’m an experienced enough solderer that I was able to make the connections without them. Below are front and back images of the circuit being put together.
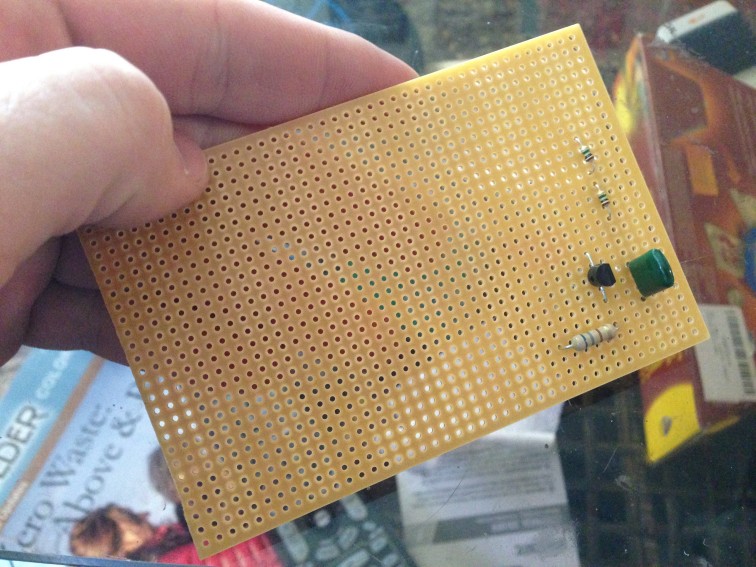
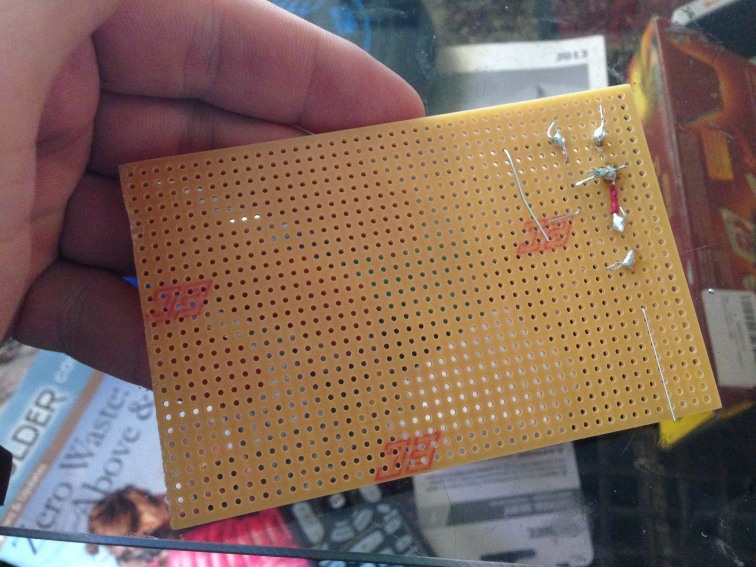
Once the circuit was complete, it was time to hook it up to the rest of the wiring.
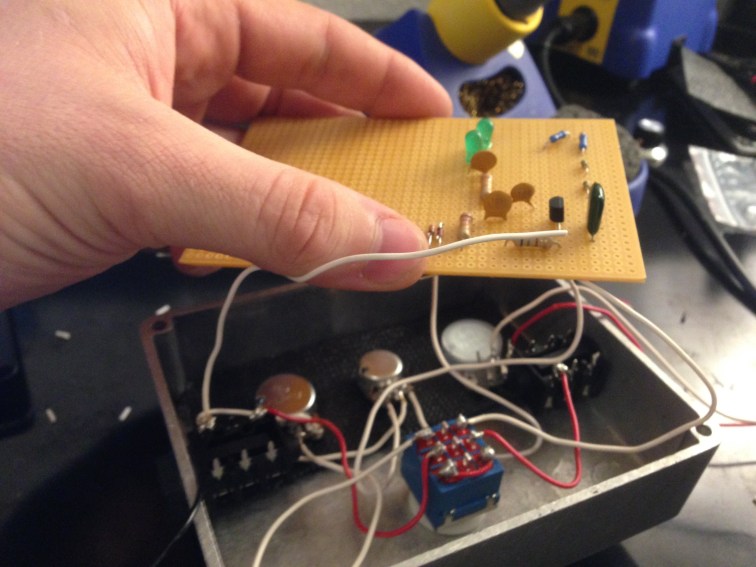
Here you can see the process of soldering the leads from the enclosure into the circuit.
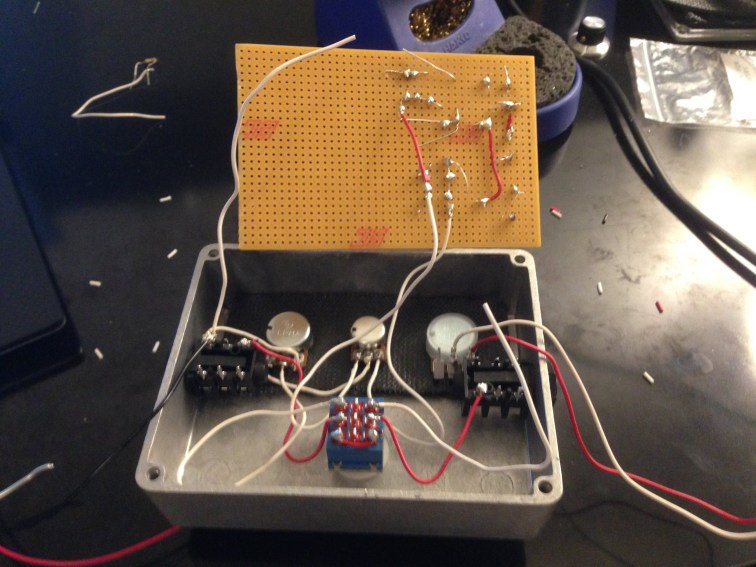
Once the circuit was soldered into the wiring, I was ready to try out the pedal!
TROUBLESHOOTING
I was really excited to plug the pedal in and give it a try. In a very anti-climactic manner, there was absolutely no sound at all. No matter if the pedal was engaged or not, there was absolutely no sound. I knew that there must be an issue somewhere with either the audio jacks or the stomp pedal. I did some more research online and found that I had wired the foot switch incorrectly. Below is an image of how the switch was initially wired. I found that it was actually rotated 90 degrees. The contacts themselves needed to be horizontal as opposed to their vertical orientation below:
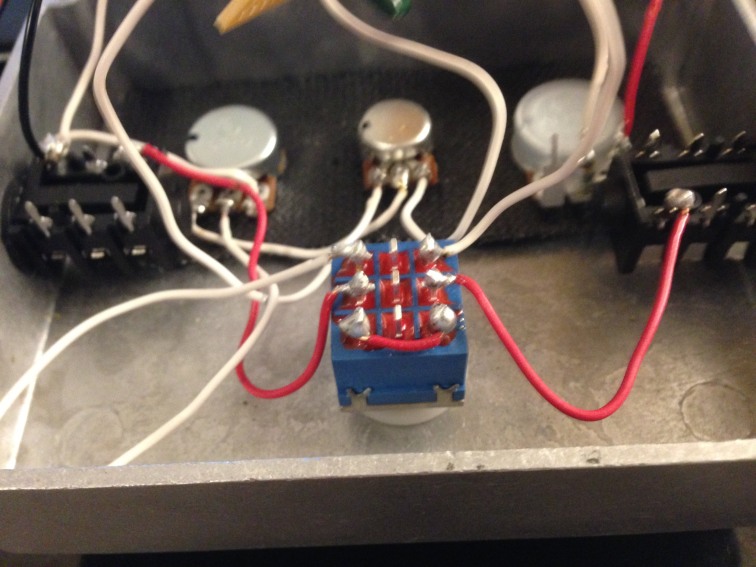
The switch was rewired to the below configuration:
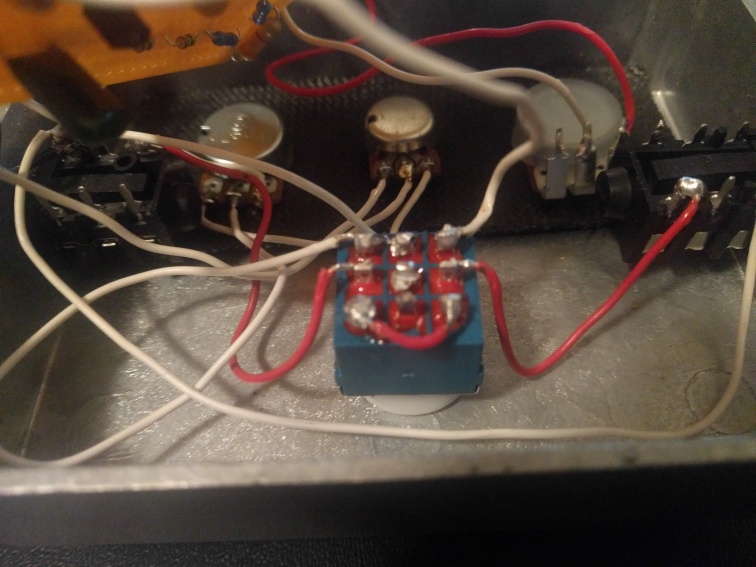
Happy that I had solved the issue, I plugged the amp back in and tried again. This time there was sound! I was getting a signal! Unfortunately, though, there was not much distortion of the signal, and there was an incredibly loud hum:
I had another problem to solve. Looking online, I found out that hum is caused by a grounding issue. It took a lot of troubleshooting before I decided to try to connect the audio in ground with the audio out ground. When I plugged the pedal in after doing this, it sounded great! The hum was gone, and the pedal seemed fully functional!
FINDINGS
Here’s a quick demo of the pedal on and off:
Not bad right? Here’s a video of the LED’s lighting up with the signal. Remember, the light generated is energy from the audio signal being converted to a different form. This is what adds the distorted effect:
Overall this was an extremely fun and rewarding project. I’d like to continue building pedals in the future and would like to focus on building all different types.
To find out more about Overdrive Pedals, please check out this great overview at Beginner Guitar HQ.
References:
